In addition to scheduling the automatic unlocking of the resource on a specific date and time, administrators can also set the resource to be locked to users after a certain number of days.
Here are the steps to follow:
1. Go to Cast Editor or Courses.
2. Click on your preferred course card.
3. Click on "Edit Course Content."
4. Scroll down the Course Editor to find the resource you want to lock on schedule. Click on the "Edit" button below it.
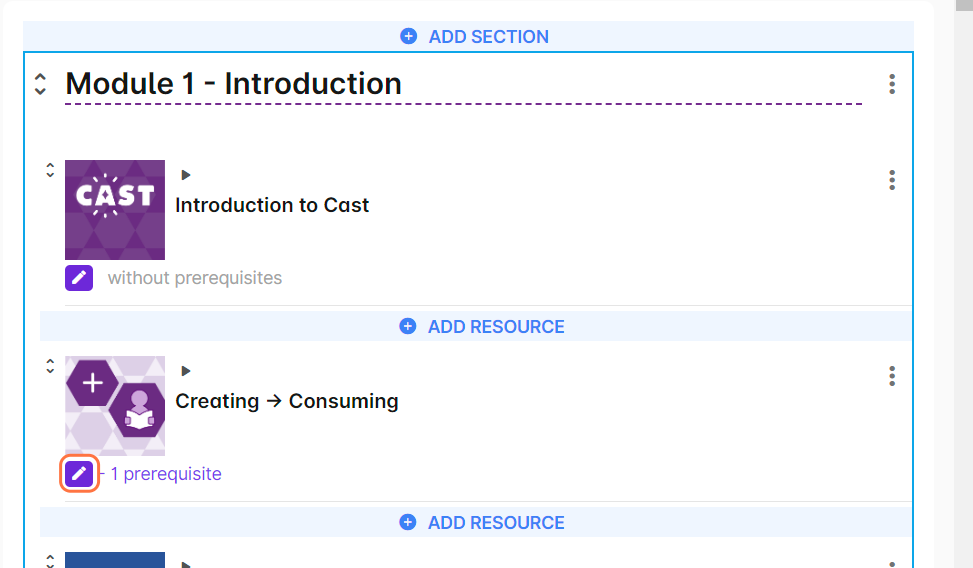
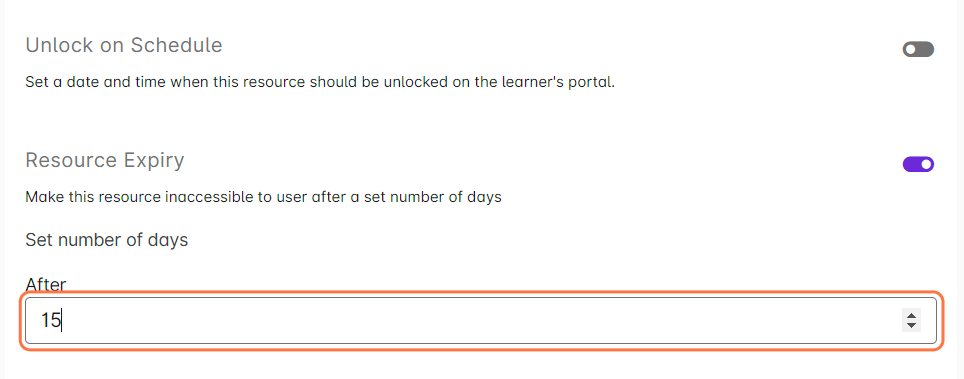
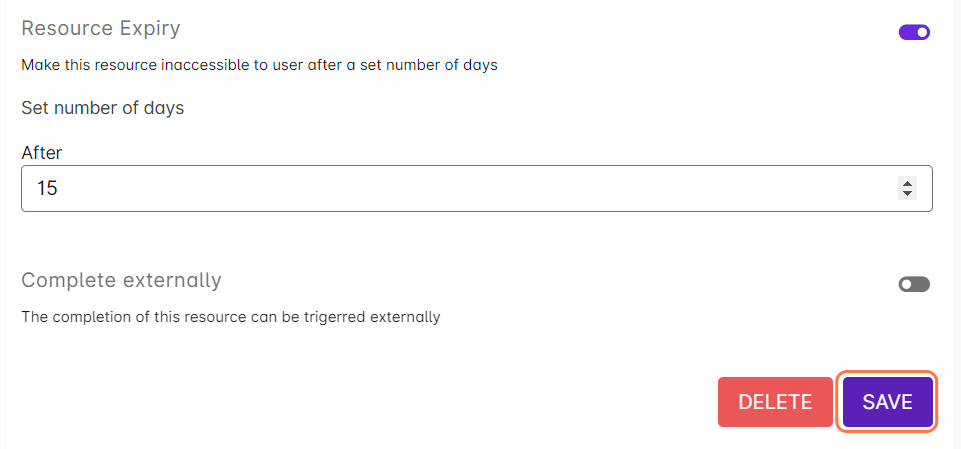
5. Enable the "Resource Expiry" toggle.
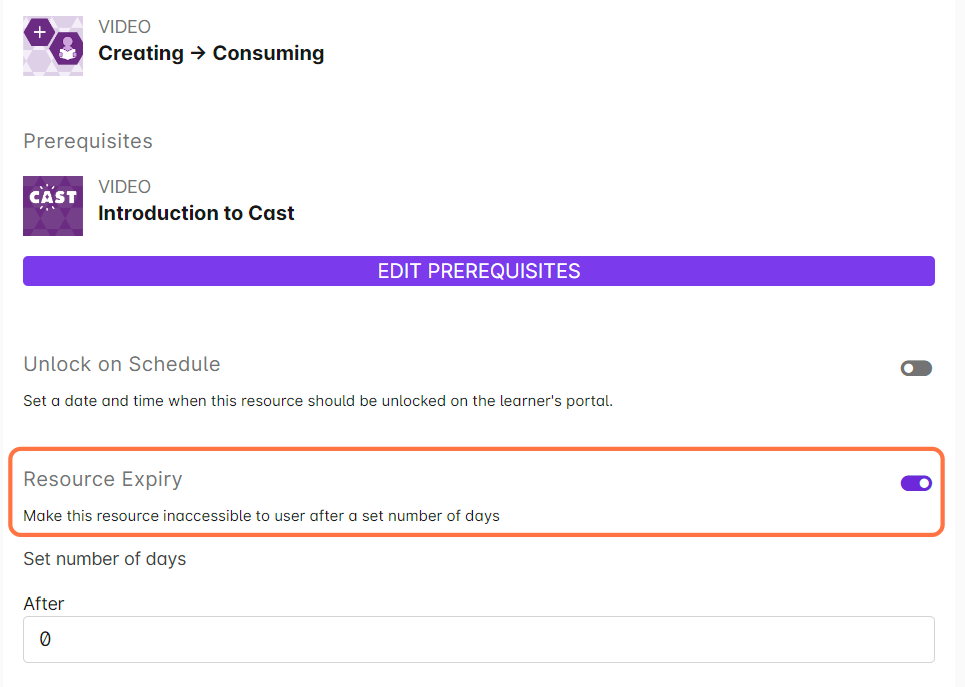
6. In the "After" dropdown menu, select or enter a numerical value. This represents the number of days learners will have access to the selected resource before it is automatically locked. NOTE: The number of days is counted from the enrollment date.
7. Click on Save to save this setting.
8. The resource expiry schedule should now appear below the selected resource.
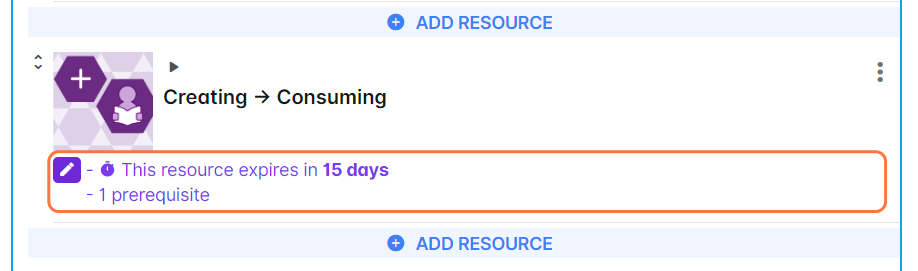
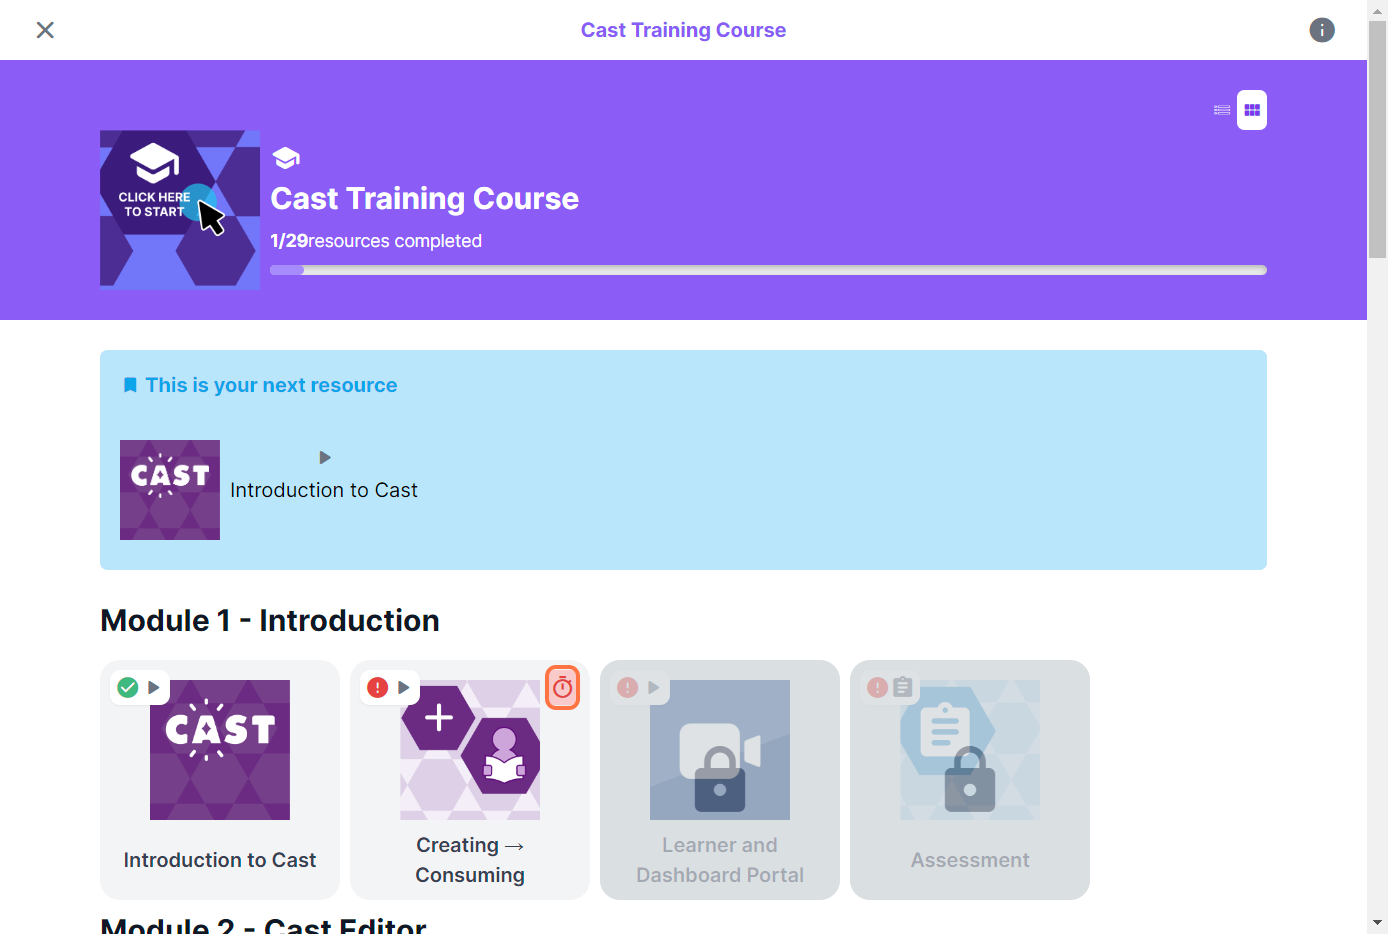
9. On the side of the learner, they can see the date when the resource will expire on their portal by clicking on the red clock icon on the resource.
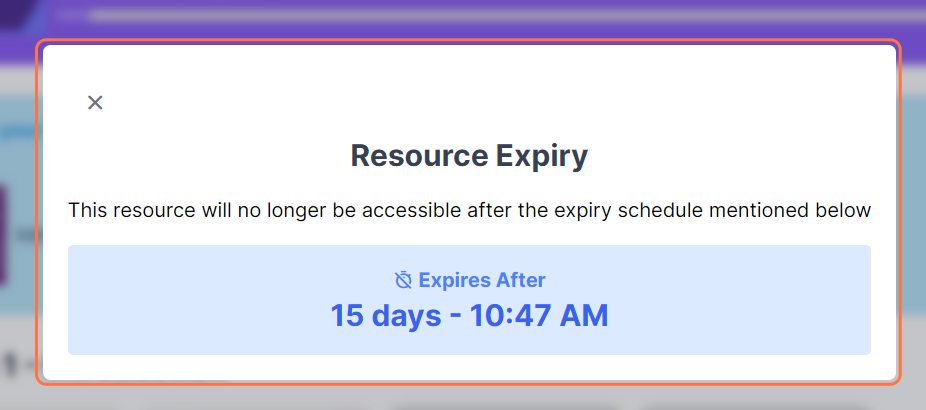
Once the resource has expired, the learner will not be able to access this resource anymore. This will appear when they try to click on the expired resource:

NOTE: You can turn this option off or adjust the days at any time.