You can create a custom role aside from the set default roles and permissions.
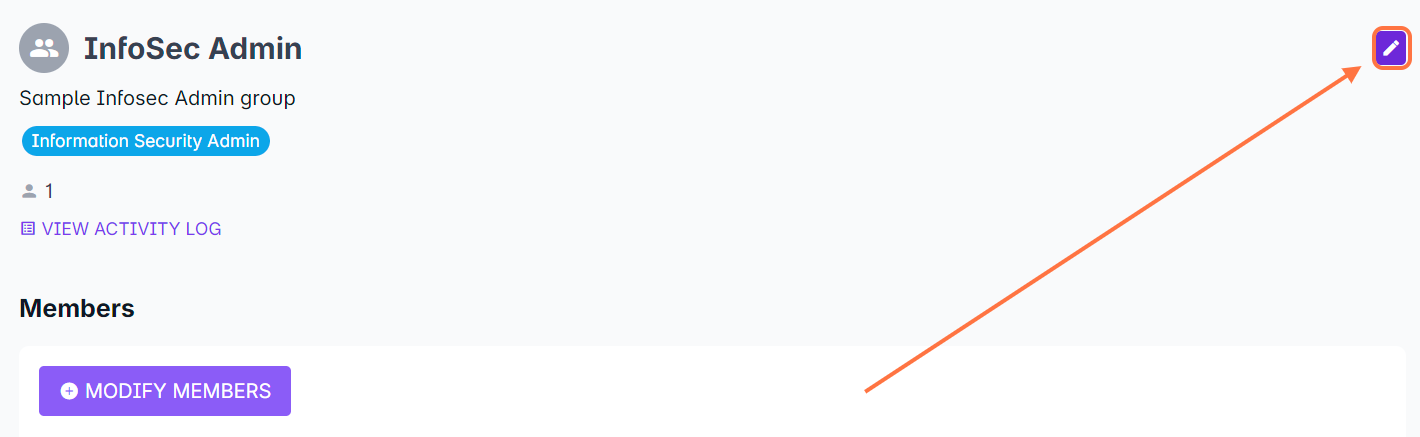
1. You can add a new role when you create a new group (https://support.castlms.com/help/creating-a-group). You can also select one of the existing groups in the list. In the Group Profile, click on the edit button in the upper right corner to modify the role of the group.
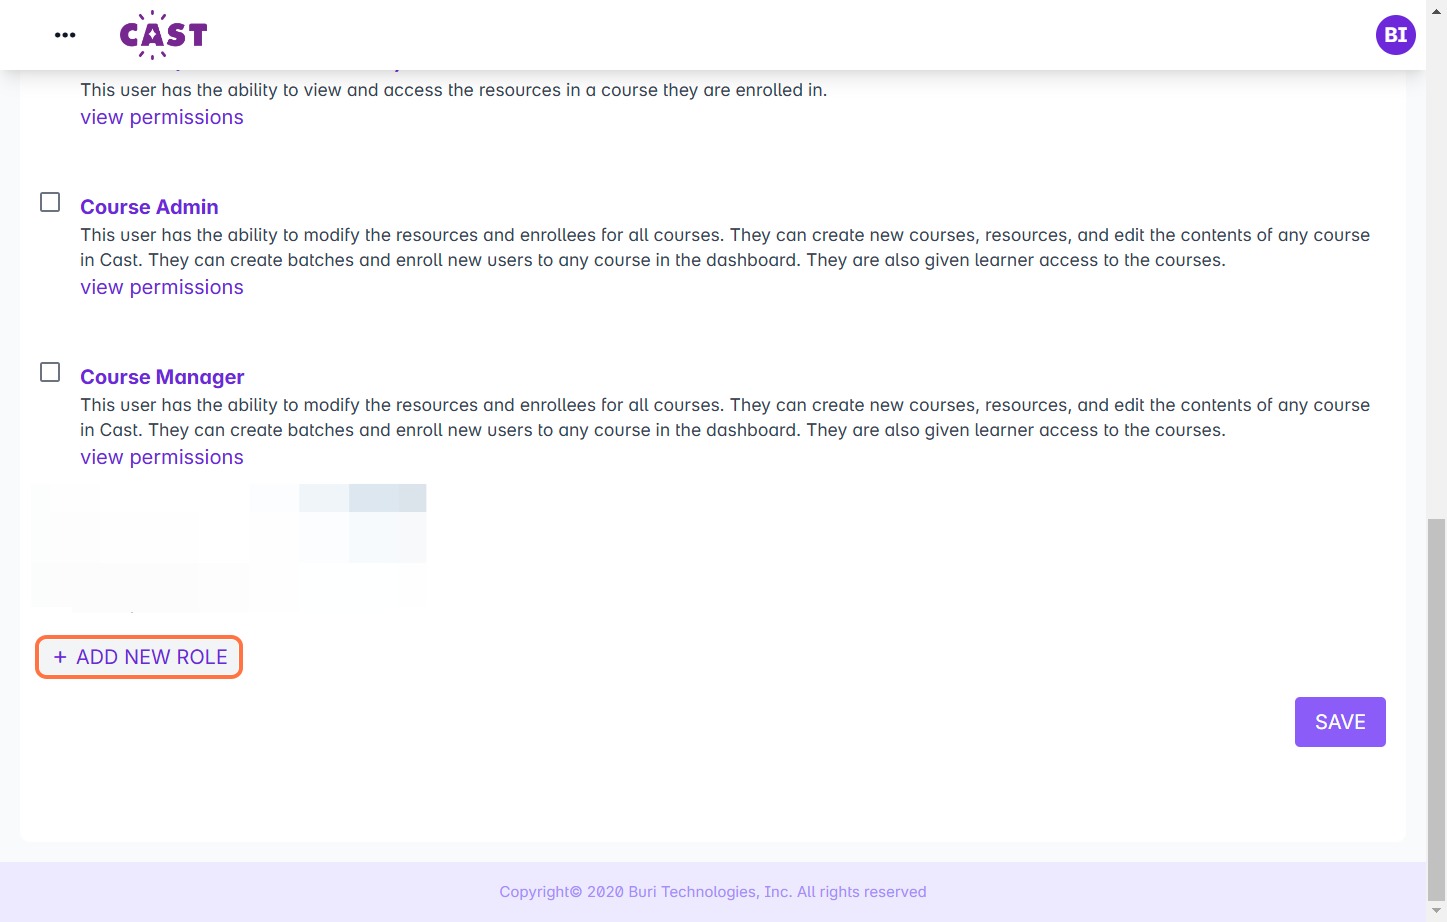
2. Click on the + Add New Role button.
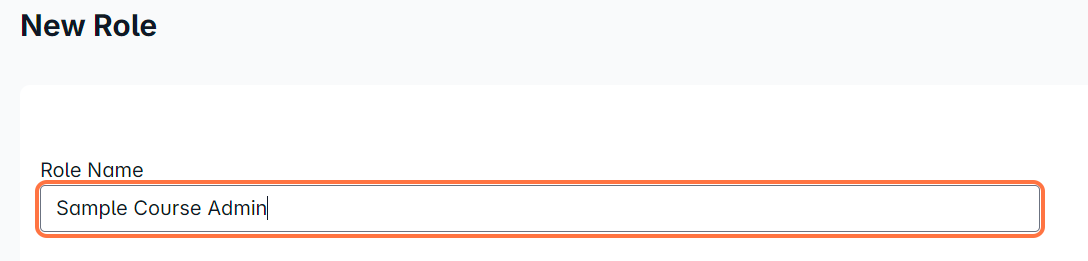
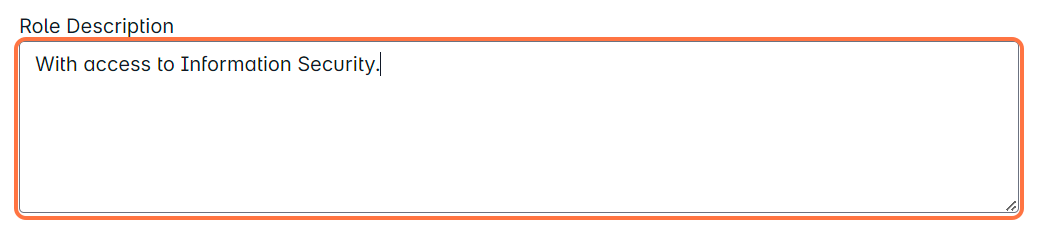
6. In the Create Role page, give the new role a name and a description.
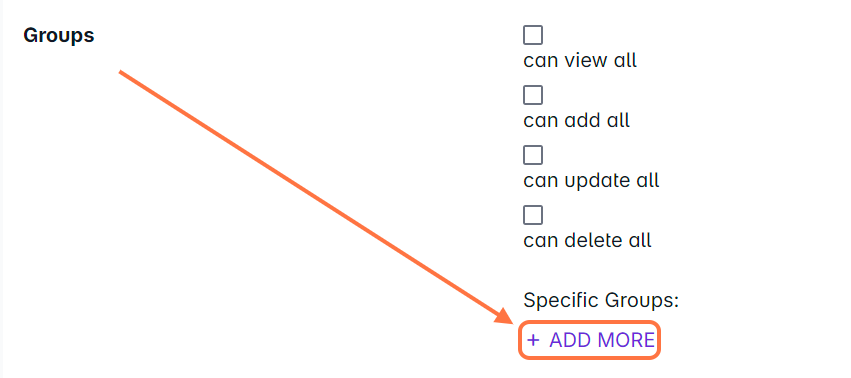
7. You can modify the group's permissions in the LMS by ticking the checkboxes across each component of the LMS.

For Groups, you can select a specific group that the custom role can add users to. Click on + ADD MORE to select a group.
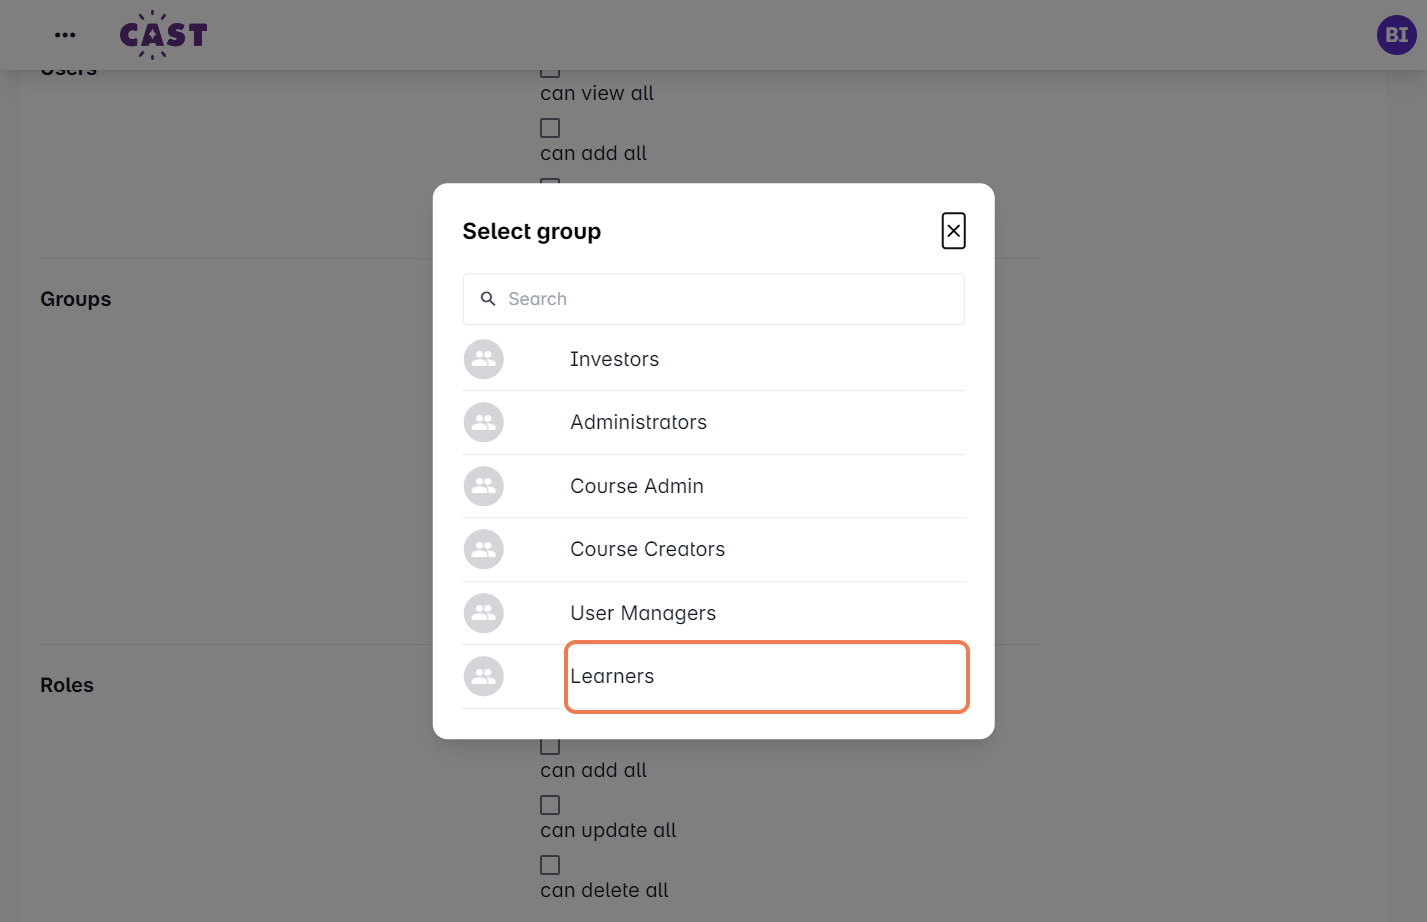
Click on one of the existing groups in the pop up box. The selected group will appear below.
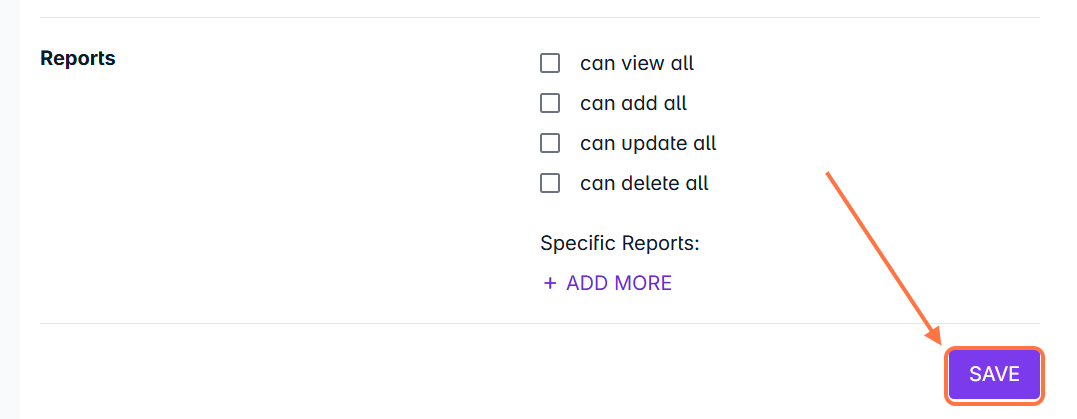
You can also do a similar thing with Courses.
8. Click on Save once you're done.
9. The custom role will appear in the list of roles. You can now select this custom role for the specific permissions to be applied to your group.