Deactivated users will not be able to access the LMS portal. For the deactivated users to be able to log in again, you must reactivate their accounts.
There are two ways in reactivating user accounts:
Option 1: From User Details
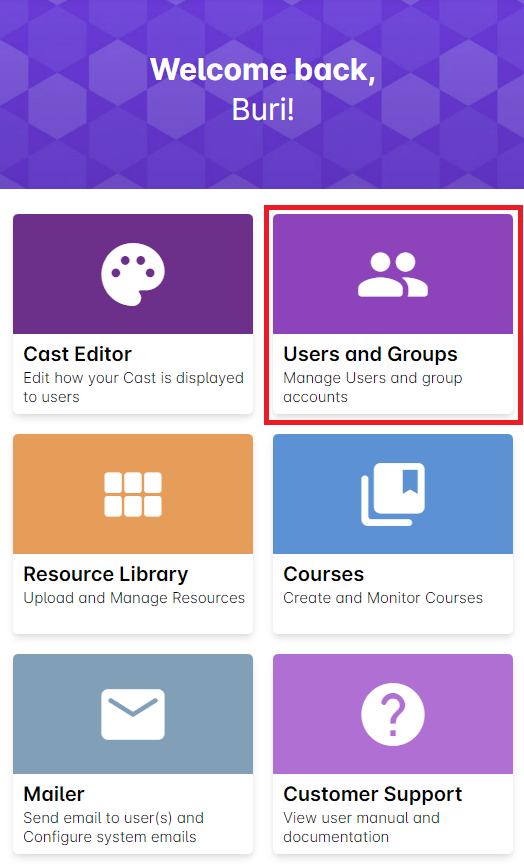
1. From the dashboard, click the Users and Groups button.
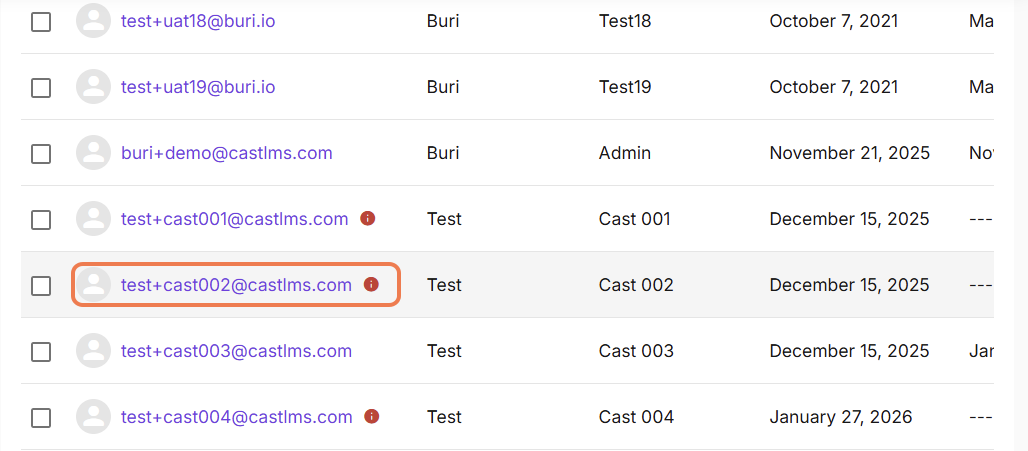
2. In the Users tab, click the name of the user you want to deactivate. You can also search for the name of a particular user by using the search bar. Deactivated users are greyed out in the user list. Click the user's email address.
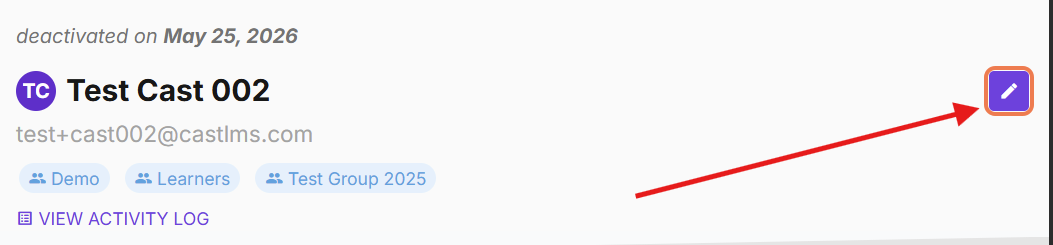
3. Once you get to the User Profile, click on the edit button on the top right corner.
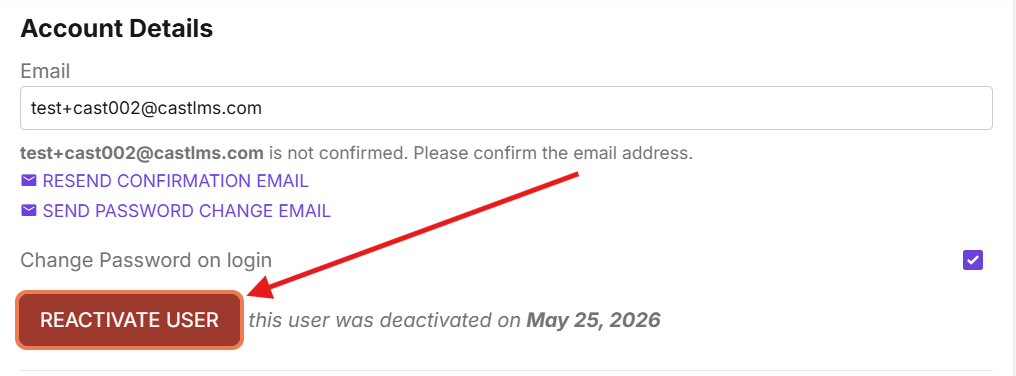
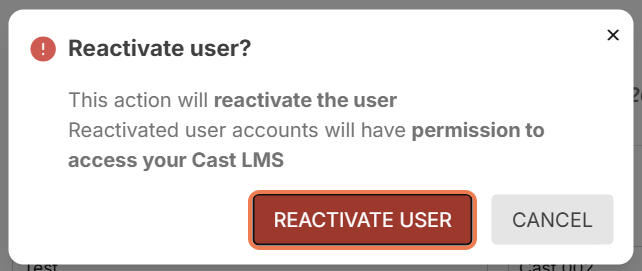
4. Click on the Reactivate User button.
5. A dialog box will pop up to confirm this action. Click Reactivate User to proceed.
Option 2: From User List
To reactivate the accounts of one or more users in the User List:
1. Go to Users and Groups.
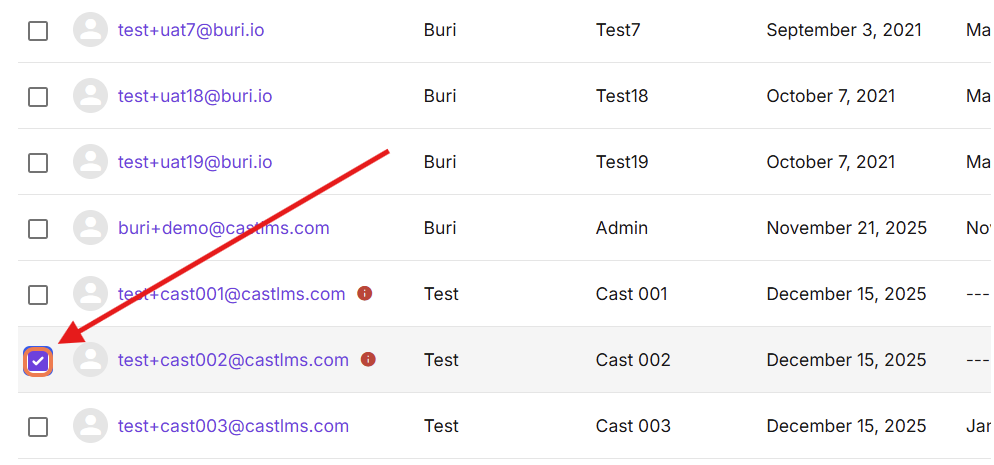
2. Check the boxes across the names of the users you want to reactivate.
3. Scroll up the page and look for the Advanced Actions menu.

4. Select Reactivate.

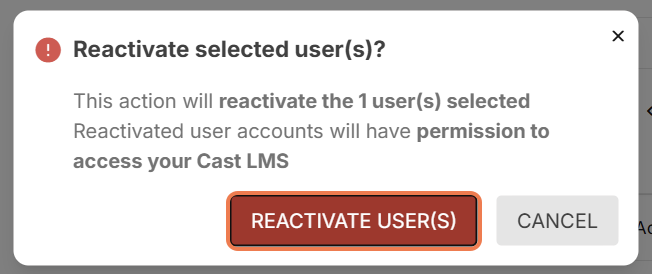
5. Confirm this action by clicking Reactivate User(s) in the popup.
Wait for a few moments until a success message appears.

Once reactivated, you can inform them that they can now log in again.
After reactivating the user, make sure to put them in the right group to grant them the right permissions. To know more about assigning them to the right group, go to this article.